
Building & Customizing A Greenhouse: Part One
The DXD greenhouse has officially become a star…yup. Always a topic of interest on instagram stories (you can see a lot of the behind the scenes of building it saved in story highlights), she finally got her 15 seconds of fame on DOMINO MAGAZINE recently when editors wanted to know the deets of how we customized an off the shelf kit. Yes…I think of her as a she. And she’s lovely!
I’m not going to lie - it’s been A LOT of work…and we’re not even done yet! But worth it? Definitely.

So why a greenhouse? And why in Southern California!? I know…I hear ya, and it’s true - the temps get so hot here in the summer she’s closed down for business July - September. But that’s not to say it doesn’t get used! Part storage shed, working station and for a good 9 months of the year a workhorse at jumpstarting things for my garden. I experiment with growing a lot of heirloom varieties and herbs/vegetables that you wouldn’t always be able to find at the farmers market and the greenhouse allows me to get a head start on the upcoming season’s plants before the raised beds are cleared out and ready for new plantings. Not to mention taking some of that internal heat to my advantage - making seed and herb drying a snap. Looking forward to using it to hang my large batch of paprika peppers later this summer which I’ll be drying for DIY spice blends.
We completed the structure this past spring (2019) and it officially got broken in for the first time in April when I started 100 different plants from seed and successfully got everything growing under its roof for summer transplanting. So, yes…for me it’s an efficient use of growing time in addition to seeding some off-season specialties like edible flowers and pre-season produce for photoshoots.

It’s also a great looking hideaway - especially on a rainy spring day - sometimes I’ll find myself down there just to get some quiet and we’ve been known to enjoy a little happy hour when the cafe lights click on at dusk. The structure has become a lovely landmark in the back of our property for edible landscaping design which is slowing happening around it. I personally think if you have the room to build one (and there are all kinds of smaller options out there) you should go for it!
And just in case you’re curious…I’ve put together a more extensive rundown on the materials and tips to get you started on a little glass house of your own!

KIT-START

After much research we landed on the PALRAM 8 x 12 BALANCE HOBBY GREENHOUSE KIT. The quality was highly rated and I really liked the simple industrial build that came with tons of opportunity for customization. It also had a cool add on details like venting windows and double doors which you really need on those hot Los Angeles days for extra circulation...in fact, I’m thinking of adding a few more pop up windows because it gets blazing in there this time of year.
When the kit arrived, I wasn’t too happy with the stock color green and wanted it to have a more modern look. So we powder coated each individual piece matte black using a powered paint gun and durable rustoleum as the coating - which has been holding up quite nicely. The results, although a lot of work, are what make this structure extra special!
An obvious thing, but worth mentioning - patience. The kit arrived in what felt like a million and five pieces and took a lot of time and organization to get it put together...my husband is a saint for going along with all of my customization ideas which make construction time a bit longer than planned. Going into this just know that the instruction manual alone is something like 103 pages. I’m not trying to talk you out of it…just preparing you.

LOCATION, LOCATION, LOCATION…
I would say the most important thing when considering a greenhouse is where to position it in the yard. Choose a well drained area that is flat and gets at least 6-8 hours of sunlight a day. We live on a hilly property, and you need a perfectly flat foundation for the greenhouse to settle properly. The biggest challenge was leveling the area by hand and then building a foundation with buried cinder blocks so the greenhouse would sit solidly on the ground. These are little details that must be taken into consideration, because of our level foundation, we didn’t have to do any sort of anchoring kit, which just looks bulky and like a trip hazard.
MATERIAL CHECK LIST:
PALRAM BALANCE HOBBY GREENHOUSE KIT (we used the 8x8 kit with the 8x12 extension pack)
MATTE BLACK RUSTOLEUM PAINT

MAXIMIZING WORK SPACE ON A BUDGET
The add-on shelving kits that come a la cart for this model are actually quite pricey for the size ($150 or so for only 4 two-foot shelves). So we used a few of those as brackets (since they lock into the greenhouse framework so nicely) and cut long redwood boards to lay on top of them maximizing shelf space on a budget - rather than just a few small shelves we have a full length workable space plus additional shelving for storage.

ORGANIZATION
Storage solutions are key with this tiny space! I’ve been using a lot of baskets to store loose items like fertilizer and dirt while keeping the space looking tidy. One of the really great things about this particular greenhouse kit is that the inside runs on a tracking system that you can hook different modular shelves or hooks into - I’ve been hanging a lot of items like tools and even a few potted plants to keep things off the ground and at arms reach.

MATERIAL CHECK LIST:
PALRAM HEAVY DUTY SHELF KIT (4 pieces)
2 x 4 REDWOOD PLANKS
LITTLE DESIGN DETAILS TO MAKE IT YOUR OWN
This is really only phase one of our customizations - and I’d love to be spending more time on the design tweaks in the near future. We have plans this year to build a larger potting cabinet with built-in sink and additional shelving. We’d also like to extending an outdoor patio area with hand poured concrete pavers while adding more customized and colorful design elements inside. But we did put a few initial things into place which make a huge difference:
GET FLOORED
Laying down some sort of floor was a main priority for me, to keep dirt and weeds down from growing inside. I opted for IKEA interlocking plastic decking tiles that were a fraction of the price of some other wooden materials, and are much easier to keep clean…just hose it down! I also laid down a perimeter of cosmetic mulching which keeps dust down as well as weeds from popping up…but don’t be surprised when a rouge tomato plant appears one day in the corner…you are doing a lot of seed starting in the joint!
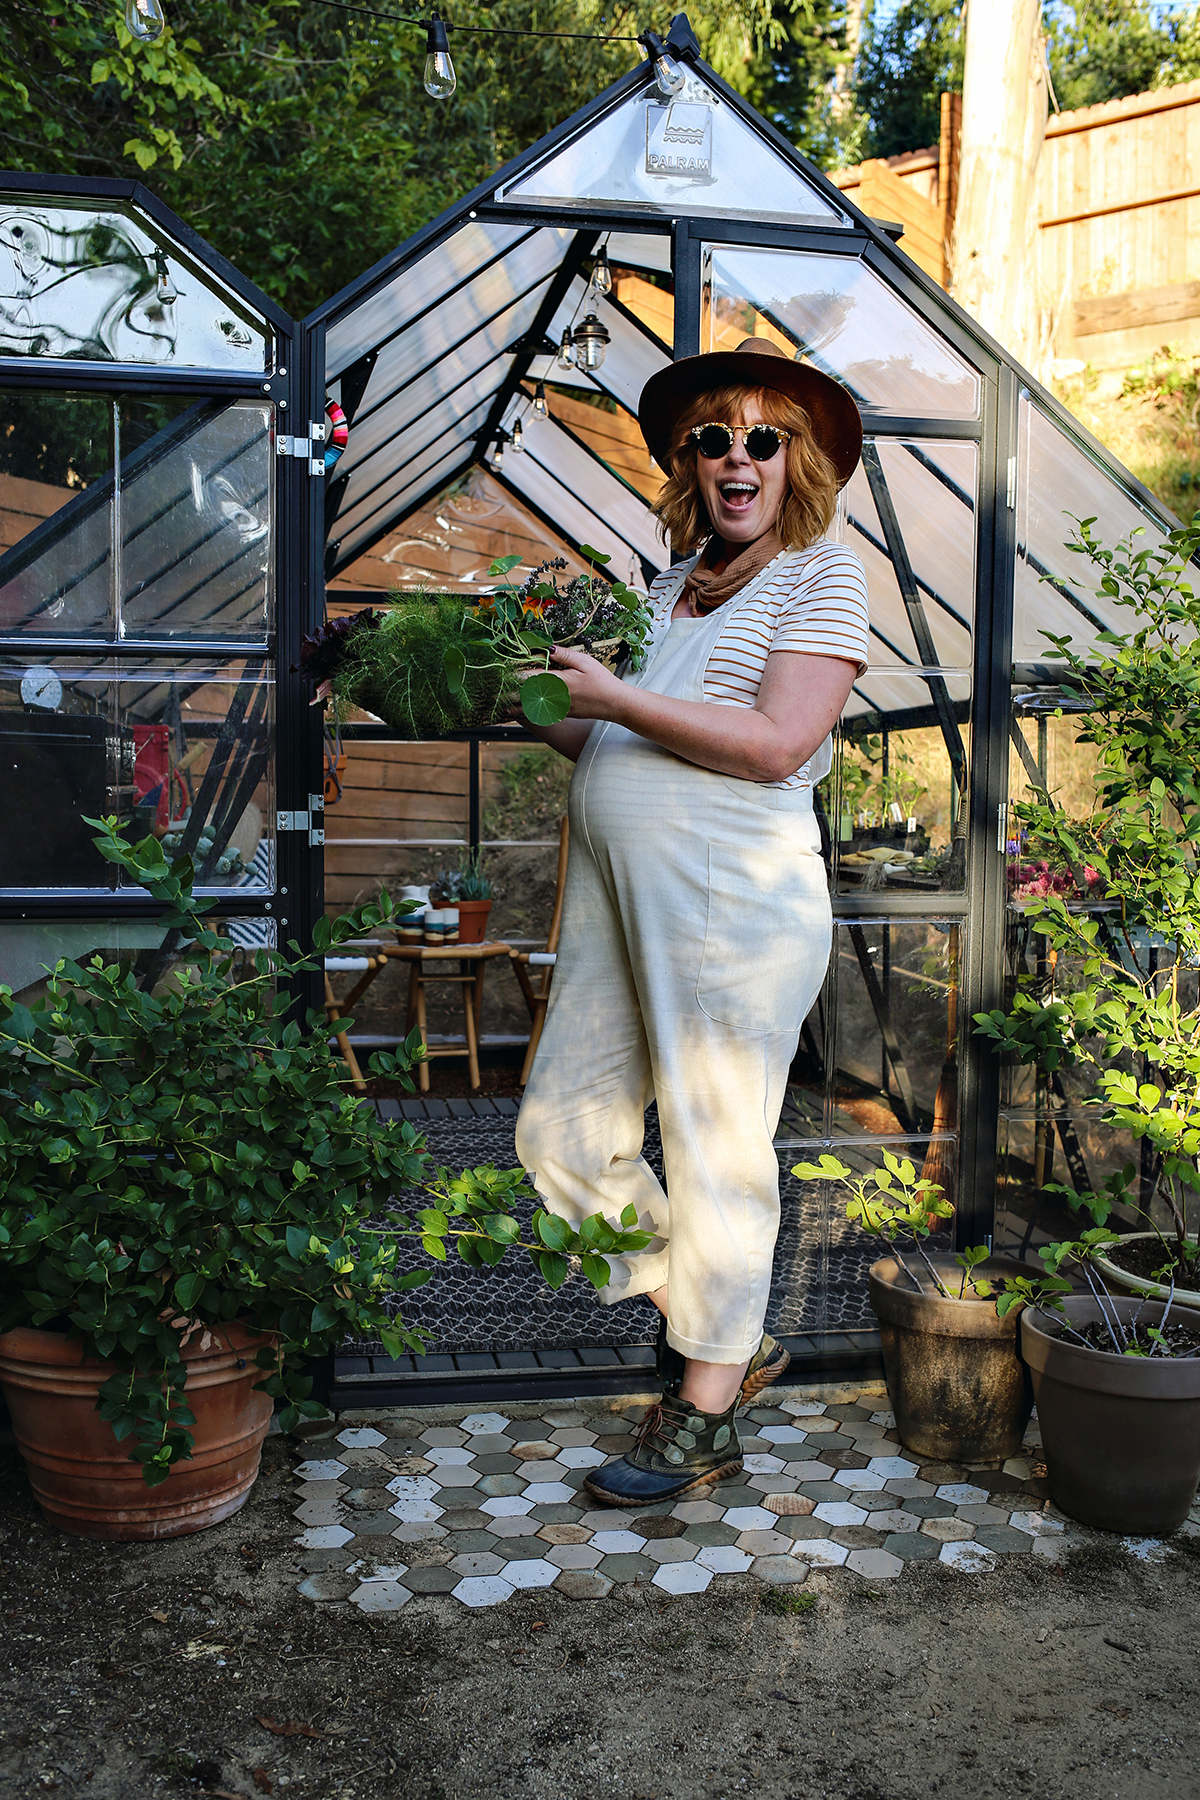
Just outside the entrance we laid down some scrap tiles, which I wish I had more of…which is exactly why we will be extending the hexagonal platform with poured concrete pavers soon. You wouldn’t believe how this small little stoop keeps so much dirt from coming inside.
LIGHT IT UP!
One of my favorite things about the greenhouse is when it lights up at dusk. We got some hefty duty solar powered cafe lights that turn the garden into a magical oasis, perfect for summer rosé sipping after a hard day of yard work. I’ve also stocked the inside with a battery powered lantern which makes for a great interior light while hanging from the ceiling…and handy when foraging for herbs in the dark.
MATERIAL CHECK LIST:

So that’s it! Phase one complete! We have an awesome functioning greenhouse that is making our homestead work harder than ever! We’ll keep you posted on the next round of updates and of course leave any questions below if you’re thinking about building one of your own. Already have one?! I’d love to see it, please share it to encourage more glasshouses to be built in backyards!
——— WANT MORE!? ———
PART TWO GREENHOUSE TO COME - INCLUDING A DIY CEMENT PAVER PATIO & DIY POTTING BENCH WITH SINK